Showing posts with label craft. Show all posts

Tuesday, December 31, 2013

The END of 2013

This year has blown by. With lots of changes in my life over the course of 2013, I am excited to see what 2014 holds for me and my family.

I thought I would wrap up the last day of 2013 with my most popular posts. I'm surprised at a few, but overall I think I've got some great readers that LOVE the same things I do!

crazylou's Top 10 Posts of 2013


Starting from the bottom and moving closer to the most popular post...

10. 40 Blows!

9. S'more Popcorn

8. Easy Breakfast Casserole


7. 40th Birthday Gifts for Men

6. Healthy Protein Shake

5. Recycled Wine Bottle Craft


2. Hot Cheesy Dip


And the most POPLUAR post on Crazylou in 2013 was...

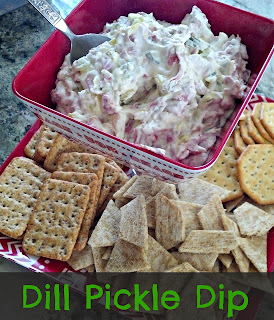
Awesome Dill Pickle Dip


Now...technically these aren't all originally from 2013. Some are from 2012, but because I finally figured out how to promote my blog and ever since I became active on Google +, these posts have found new life!

Be sure to follow me!

GOOGLE +

FACEBOOK

TWITTER

INSTAGRAM

PINTEREST


Many thanks to all my readers. Thank you for giving me a reason to keep up with this blog. I love your comments, emails and interaction on the different social media outlets. I look forward to growing and expanding Crazylou in 2014!

Here's to a fabulous ending of 2013 and a joyous beginning to 2014!


Pin It!

Thursday, November 14, 2013

Crazy-easy Polka-dotted Wooden Frame

Remember last week when I shared a quote and said that I had a project for that quote? Well...I finally took pictures and can share it with you. Just in case you missed my previous post, you can find it here.

This has got to be one of the easiest craft projects to do. Hardly any skills are required. My kids could do this. Which means if you don't think you are "crafty"...you need to try this! It's crazy-easy to do! I dare you to try it!!

Easy Polka-Dot Wooden Frame by crazylou. #wooden #frame #spray #paint #dots


Here's the basic instructions for this polka-dotted frame.

Materials
Wooden Frame ($1 from Michaels)
Spray Paint (2 colors, I used black and platinum silver)
Circle Stickers (I used garage sale stickers)

Instructions
Wipe off frame with cloth. Spray paint base coat. This will be your bottom layer or the color of your polka dots. Allow to dry. Arrange circle stickers over the frame. Press each one down to secure it to the wood. Take second color and spray paint over the frame. Allow to dry. Peel stickers off of frame and enjoy your new crafty creation!
 

Easy Polka-Dot Wooden Frame by crazylou. #wooden #frame #spray #paint #dots

I love it! You could use green and red for a holiday theme, add a bow or leave it as is. I can't wait to give this as a gift this holiday season!


Pin It!

Friday, August 9, 2013

Super Easy Bleach Pen T-Shirt

Howdy! It's FRIDAY!! We are busy with our County Fair this week--it's an end-of-summer tradition to go to as much as we can. Once the fair ends, school begins! Which is next Wednesday! (yeah!!)

I'm sharing a project that my son and I did together. We had fun working on this shirt and he wears it every week! The best part--it is completely customizable and only takes a few minutes!

Bleach Pen T-Shirt

1 colored shirt
1 Bleach Pen
Cardboard

Place cardboard in the middle of the shirt to protect the bleach from transferring to both sides. Decide on what you'd like to put on your shirt. Carson wanted Chicago Cubs. Once you've decided on your creation, carefully use the Bleach Pen to draw it out. You could use a stencil or freehand. I did my best freehand artwork to create the "C" for the Cubs. Allow to sit (in the sun if possible) until dry.  We allowed it to set overnight.

Wash the shirt and wear! We decided to go one extra step and cut off the arms to make a tank top. And like I mentioned before, he wears this every week!!


DIY Craft Bleach Pen T-Shirt

DIY Bleach Pen T-Shirt Tank

What kind of craftiness have you been up to lately?


Pin It!

Wednesday, May 15, 2013

Wood Photo Block

Happy Wednesday! I'm sharing a project I made for our mom's for Mother's Day this past weekend. (by the way, here is a pic of me and my kiddos on Mother's Day--aren't they cute?)

Okau, now on to the project! I originally saw this idea from the Groopdealz daily email about a month ago. I already had the supplies on hand so this project/gift cost me nothing! Even if you didn't, it still wouldn't cost that much to put together.

Wood Photo Block

Supplies
Wood block (size depends on how many photos you'd like to display)
Scrapbook paper
Vinyl letters or stickers
Modge Podge
Mini Craft Clothes Pins
E600 Glue

Directions
Sand the wood block and wipe away dust. Measure scrapbook paper to fit the size of your wood block. I chose a neutral paper. Apply Modge Podge to the wood block and carefully place the paper over top. Smooth out the paper. I also sanded the edges of the paper for a "rough" look. 
Cut out the saying you want to put on your block. I used the one that was on the Groopdealz, because I thought it was perfect. But, you could use this for Graduations (Class of 2013), Mother's Day (My Precious Blessings), Father's Day (My Cool Kids), etc. Once you have your vinyl letters or stickers ready, place them on the block, centering it on the block, but also allowing space on top for the clothes pins. 
Next, space out the clothes pins evenly. Apply E600 glue to the back of the clothes pins and place in desired spot. Allow to dry. Find your favorite pictures, cut to size and stick in the clothes pin! 
This project came together quickly, too. With the drying time included, it was less than 1 hour! I love how these turned out--and I believe the Grandma's loved them too!

Wood Photo Block


What do you think? Cute, huh? I'm loving the expression on Carson's face in one of the pictures--priceless!!

Thanks for stopping over today! Please be sure to follow me on Facebook, Twitter and Pinterest!


Pin It!

Friday, March 22, 2013

Photo Garden Spring Craft

Hello friends! Did you know it's officially Spring? We are 3 days in and there are still no signs of it around here! And they are calling for more snow this weekend! AGH! I want to wear flip flops and run outside! Anyways, I've got a cute little craft that Carson and I did together awhile ago. We decided to give it to Grandma Rowe for her birthday, but I think it would be a nice Mother's Day gift, too!
The project takes just a few supplies to come together, which you could purchase at the Dollar Store, if you didn't already have them in your craft supplies at home! You will need a sytrofoam circle (or square would work too!), craft sticks, craft paint, pictures of your kids, craft punch or scissors, hot glue gun, ribbon and tag.
photo garden

First Step:
Paint your craft sticks. We decided upon 4 different colors. Carson got crazy mixing up the paints on the sticks to make it more colorful. I love how they turned out! Allow paint to dry.
Second Step:
Cut the faces out that you want to display in your garden. I used a craft punch, but scissors would work just fine too! I punched out 2 additional scalloped punches from scrap paper to put behind the picture to give it a finished look.
Third Step:
Once the paint on the sticks is dry, you are going to break off pieces at one end to give a jagged fence look. If you didn't want a jagged fence look, you could cut off the ends so all of the sticks were the same size, but a little bit taller than the foam circle. Keep the broken or cut ends to use later! Keep enough sticks for the amount of pictures you have--these you will want longer.
Forth Step:
Hot glue the cut sticks around the foam circle--make sure to line them up evenly at the bottom edge of the circle. Allow to dry. Wrap a piece of ribbon around the fence to give it a complete look, hot glue to keep in place. Attach a tag if you wish.
Fifth Step:
Grab your pictures and broken/cut sticks and create a "flower" pattern with the sticks behind the picture. Glue sticks together and to the picture. Now, glue the flower to a painted craft stick. On the opposite side of the flower, hot glue the cut-out scrap paper to cover the back of the picture. Stick into the foam circle.
Last Step:
Hot glue some "grass" to cover up the foam circle. We used green shredded paper from the Target Dollar Section (LOVE!). Now, wrap it up and give it away--or display it with pride in your home or office!

What do you think? For less than $5, I created a nice gift for a special person! I think it turned out great--what a way to cheer someone up too! Who said a garden had to have real flowers in it?!?!

If you like this project, please comment and share! Thanks!

Cindy

Pin It!

Thursday, January 17, 2013

Fun Kids Craft--Ribbon Key Chains

I've been in a funk lately. I was off of work for 3 weeks for foot surgery and I had big plans of preparing blog posts, making fun enhancements to the blog and various other little things that I could do with my leg elevated and my butt planted on the couch. But, instead, I caught up on all my shows, watched a few movies, wrapped Christmas gifts and played on Facebook and Pinterest. Oh, and I did work from home a bit too.

So, now that I'm back at work full-time and the kids are back at school, I'm trying to get in the swing of things. It's just harder than I thought. And now I have to fit physical therapy into my crazy schedule! ARRGHHH! Anyways....

This is a project Hailey and I did before the holiday madness. She gave this to her teacher for a gift! Along with this really cool plaque for her desk (you can buy it here).
Make a Difference

Here are the simple instructions and a picture tutorial:

Ribbon Keychain
Ribbon Keychain
This is a fun project to do with kids and something they can give as a gift or keep for themselves. It’s a just a few simple materials and about 10 minutes to pull this craft together!

I did this with my eleven year old daughter, but I think it would be a good craft for kids 6-12 years of age.

Materials:
ribbon keychain

Jewelry Split Rings
Ribbon—2 patterns: 20 inches of one, 4 inches of another
Scissors
Ruler
Hot Glue


Instructions:

Step 1: Cut a piece of ribbon 20 inches long and two coordinating pieces 2 inches long.

Step 2: Slip key ring onto ribbon; fold over and secure with hot glue (done by an adult if it is not a low temp gun)

Step 3: Use the small pieces of ribbon to wrap around the top part of the key chain, spacing them slightly apart.

Step 4: Cut to the length you wish the key chain to be.

Options:
You could use fabric paint to decorate or personalize.

Super simple and quick! Plus this is something that someone will use! How cute would it be if you added some stick on rhinestones, too?

Here is the picture tutorial:


 Her teacher sent us a note thanking her for such a creative gift! Love it! What creative things are you up to? This is the project we did over at RockfordParent.com, too! Come on over for a visit!

Don't keep me hanging--I love comments!

Cindy

Pin It!

Thursday, January 3, 2013

Easy Photo Coasters

I've been waiting to share these with you for awhile--I'm so excited to finally show them off! I made these Easy Photo Coasters for my parents and for my mother-in-law for Christmas and I absolutely loved how they turned out! I can't wait to make a set for myself, too!

I bought the plain white tiles at the Habitat for Humanity Store for pennies (you can get them real cheap at Lowes, Home Depot, etc.), took my favorite pictures and put it all together! The hardest part is seriously picking out the pictures! Here are the easy instructions:

  1. Clean and dry the tiles
  2. Cut the pictures down to 4x4 size
  3. Get out your Modge Podge and put a thin layer on the tile, carefully lay your picture down on the tile.
  4. Let dry.
  5. Continue to put thin layers of Modge Podge over the pictures, making sure to let each coat dry before applying the next.
  6. I put about 6 layers of Modge Podge over each picture.
  7. When Modge Podge is dry apply a spray sealer over the pictures.
  8. Apply felt to the corners to protect the surface the coasters lay on.
  9. Allow the coasters to cure 30 days before setting any hot mugs or cups that will sweat on the coasters. This will hopefully prevent damage to the pictures.
 
Even though this is a process, it really does come together quickly. I let the coasters set overnight before spraying with the sealer.
I wrapped them with a cute bow and put them in a gift bag. I think they really enjoyed their gift and now they can show off their grandchildren to all their guests!
Now that I shared them with you, I've got to go make a set for my house! Happy crafting!

Cindy


Pin It!

Saturday, December 1, 2012

Painted Homemade Ornaments--Easy Gift Idea!


With the holidays quickly approaching, the kids and I worked on a special gift idea. I’ve made the cinnamon applesauce ornaments in the past but I was anxious to try something new! Both recipes are fairly easy and use ingredients you most likely have on hand. The directions are simple too, so little hands can help! Both of my kiddos had fun stamping, painting and decorating their ornaments.

We tried two different recipes—both turned out equally well, so I can’t recommend one over the other according to the appearance. If you want the “easiest” recipe—that would be the salt dough recipe (#1)—this one doesn’t require using the stove top and cooling, you simply mix up, roll out, cut and decorate. If you want crisp white ornaments, I’d go with the clay-type recipe (#2)—this would be good if you decided not to paint or decorate and wanted a clean and simple look.

Here are the two recipes:

Salt Dough Ornaments (#1)
2 c. flour
1 c. salt
1 c. luke warm water

Combine ingredients in large bowl and mix together until the dough forms. Lightly flour the surface and roll out to about ¼ inch thickness. Use cookie cutters to make the shape. Use a straw to make the hole for the ribbon to hang the ornament. We used craft paint and stamps to decorate our ornaments, but you can leave them undecorated too. Once you make all your ornaments, you can allow them to air dry or bake them at a low setting (200 degrees) for 30-60 minutes, rotating after 15 minutes and checking to make sure they do not start to brown. After they are cool and dry, spray with a clear coating spray to preserve the ornament. Tie a string and hang!

Clay Ornaments (#2)
½ c. corn starch
1 c. baking soda
¾ c. water

Combine ingredients in a saucepan and heat over med-low heat. Keep stirring until it forms a mushy dough, similar to mashed potatoes. Once that consistency is formed, place dough on a surface to cool (we put it on a cutting board). Once cool, roll dough out to about ¼ inch thickness. Use cookie cutters to make the shape. Use a straw to make the hole for the ribbon to hang the ornament. We used craft paint and stamps to decorate our ornaments, but you can leave them undecorated too. Once you make all your ornaments, bake them at a low setting (200 degrees) for 30-60 minutes, rotating after 15 minutes and checking to make sure they do not start to brown. After they are cool and dry, spray with a clear coating spray to preserve the ornament. Tie a string and hang!

Have fun making these with your kids—we sure did! (We even had a neighbor friend come over and join us!)

I've featured this project over at www.rockfordparent.com--come check it out!

Cindy

Pin It!

Thursday, November 1, 2012

Let's Talk Turkey (Napkin Rings!)

Today marks a very exciting day for me--I am officially the new Arts & Crafts contributor for RockfordParent.com! Wahoo! RockfordParent is a great resource for well, Rockford area parents. It has a great Get Inspired section, an Arts & Crafts section, and a Recipe of the month which is featured by Sylvia from Sylvia's Kitchen. You'll also find a Bookworms Section with great books for kids that are recommended by the Rockford Public Library. Each of the sections are updated at the beginning of every month. You can also keep up-to-date throughout the month via their Facebook Page. If you live in the Rockford Area, you need to check out this website and/or their Facebook page. You'll find some part of it a helpful resource for you!

This is what I featured this month, my debut! I think it's perfect for the Thanksgiving Table and something that the kiddo's will enjoy creating.

Thanksgiving Turkey Napkin Rings


Materials
·        Flat wooden craft spoons
·        craft paints
·        Paper towel or toilet paper tube
·        Scissors
·        Yellow pipe cleaners
·        Eyes or  Black marker
·        Tacky glue
·        Red felt


Instructions
1.     Five craft spoons are required for each ring. Using craft paint, paint one of them yellow for the turkey's head, the others, a variety of colors—we used green, orange and blue—these will be the tail feathers.
2.     For the turkey's body, cut a 2-inch section from a cardboard paper towel or toilet paper tube and paint it brown.
3.     From yellow pipe cleaners, shape a pair of short legs with three-toed turkey feet. Cut small holes in the tubes and fit the legs through small holes, bending the tips inside the tube to secure them.
4.     Use tacky glue to attach the eyes or simply use a marker to draw eyes on the face.  Use tacky glue to attach a red felt wattle.
5.     Finally, glue the head to the front of the body and the tail feathers to the back.
6.     Allow to dry approximately 1 hour before using.
7.     Roll up a paper or cloth napkin and set at each table setting.


 Isn't he adorable?!


This is what the table setting could look like for the big feast!


  My son and I had fun putting this craft together! Can't wait to use them on our table in a few weeks! 


Cindy

Pin It!
Related Posts Plugin for WordPress, Blogger...